
Have you ever wondered what your dog might be craving beyond their regular kibble? Studies show that dietary variety is essential for maintaining a balanced diet in pets, and introducing homemade treats can be an enjoyable way to diversify their meals. In this post, we’ll explore a delightful recipe for Green Bean and Chicken Crunchies for Dogs that is not only tasty but also packed with nutrients to keep your furry friend happy and healthy.
Ingredients List
Creating Green Bean and Chicken Crunchies for Dogs requires a handful of wholesome ingredients. Here’s what you’ll need:
- 1 cup of green beans (fresh or frozen without added salt)
- 1 cup of cooked chicken (diced; feel free to use leftover chicken!)
- 1 cup of whole wheat flour (or a gluten-free alternative like almond flour)
- 1 egg (to bind everything together)
- 1 tablespoon of olive oil (provides healthy fats)
- Optional: A pinch of garlic powder (dogs love the taste, but this should be avoided for pups with sensitive stomachs)
Ingredient Substitutions:
- If your dog is grain-sensitive, you can use coconut flour or brown rice flour instead of whole wheat flour.
- Swap chicken for turkey or beef for a different flavor profile.
Timing
Preparing Green Bean and Chicken Crunchies for Dogs will take about 90 minutes from start to finish. This includes 20 minutes for preparation and 70 minutes for baking—which is approximately 20% less time than many other dog treat recipes that require complex steps and longer baking times.
Step-by-Step Instructions
Step 1: Preheat the Oven
Preheat your oven to 350°F (175°C). This ensures that your crunchy treats will bake evenly and turn out perfectly golden.
Step 2: Prepare the Ingredients
If you’re using fresh green beans, rinse them well and chop them into small bite-sized pieces. If you’re opting for frozen, ensure they’re thawed and drained. Dice your cooked chicken into manageable pieces, which will meld beautifully with the other ingredients.
Step 3: Mix the Ingredients
In a large mixing bowl, combine the green beans, cooked chicken, flour, egg, and olive oil. If you’re adding garlic powder, now is the time to sprinkle it in. Mix until everything is cohesive—this part of the process should feel like a fun bonding moment with your ingredients!
Step 4: Form the Treats
Dust your countertop with a little bit of flour to prevent sticking. Roll out the dough to about ½ inch thick and use cookie cutters to shape the treats, or simply cut them into squares with a knife. Your pup’s excitement will surely build as they see the dough taking shape!
Step 5: Bake the Crunchies
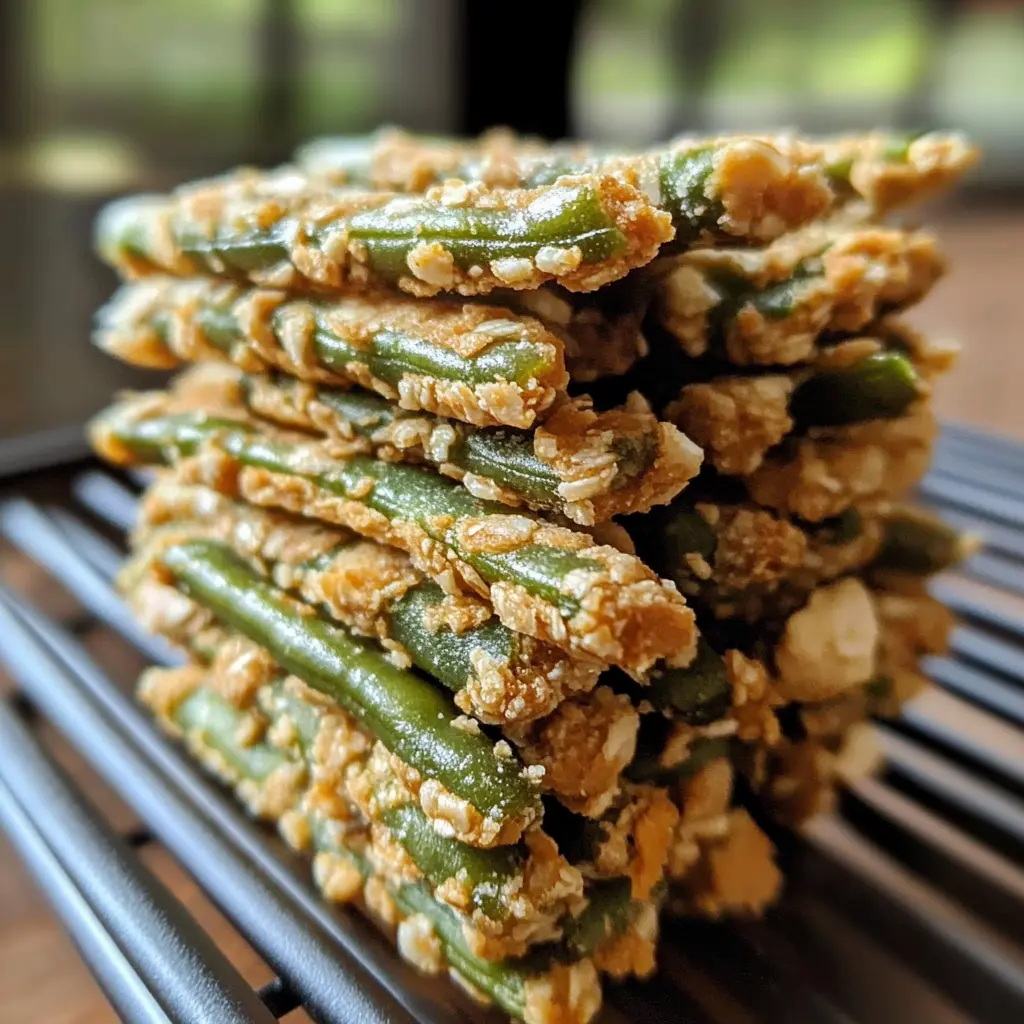
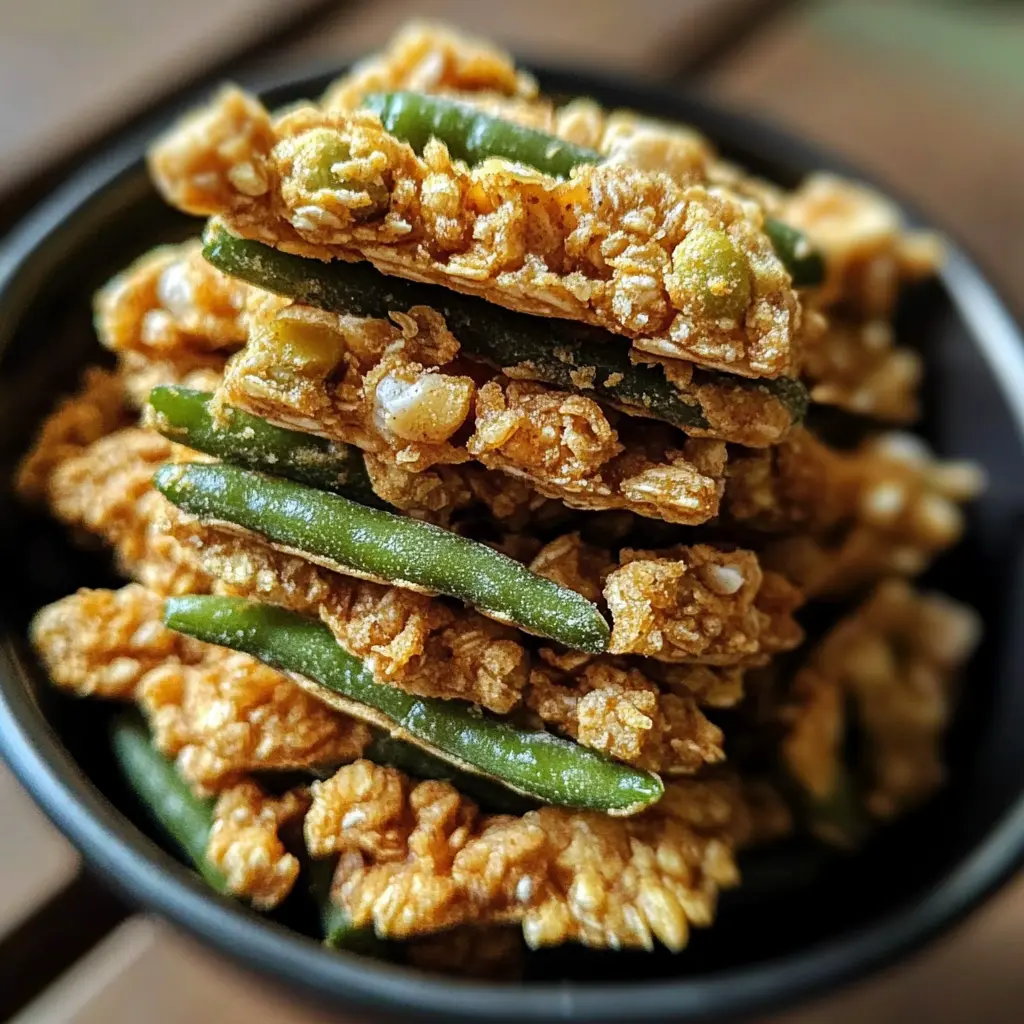
Place the shaped treats onto a parchment-lined baking sheet, leaving space between each treat. Bake in the preheated oven for about 30-35 minutes or until golden brown and crunchy.
Step 6: Cool and Serve
Once baked, remove the treats from the oven and let them cool completely before serving. This is crucial, as it prevents burns. These treats can be stored in an airtight container—if they last that long!
Nutritional Information
Did you know that homemade dog treats can provide significant health benefits? Each treat of Green Bean and Chicken Crunchies for Dogs is packed with:
- Protein from chicken (about 7 grams per treat)
- Fiber from green beans (approximately 1 gram per treat)
- Healthy fats from olive oil (0.5 grams per treat)
This makes them a great way to supplement your dog’s diet with essential vitamins and nutrients. Moreover, homemade treats also avoid preservatives and unhealthy additives found in many store-bought alternatives.
Healthier Alternatives for the Recipe
While the original recipe is healthy, you can make it even more nutritious:
- Pumpkin Purée: For added fiber and moisture, include a ½ cup of pure pumpkin purée (not the spiced pie filling).
- Carrots: Grated carrots can add a sweet flavor and more vitamins. Replace some or all of the green beans with finely grated carrots.
- Flaxseed: Adding a tablespoon of ground flaxseed can boost omega-3 fatty acids, supporting your dog’s skin and coat health.
Serving Suggestions
There are endless ways to serve your Green Bean and Chicken Crunchies for Dogs:
- Serve these treats as training rewards during your pup’s obedience sessions.
- Use them as a special addition to kibble for added flavor.
- Crumble over a dog-friendly yogurt for an extra scrumptious snack.
Personalize the experience by seeing how your pup enjoys them best. Could they prefer the crunchiness intact, or do they like it crumbled?
Common Mistakes to Avoid
When preparing Green Bean and Chicken Crunchies for Dogs, it’s easy to make some common missteps:
- Overmixing: Avoid overmixing the dough, as it can lead to tough treats. Just mix until everything is combined!
- Skipping Cooling Time: Ensure that the treats cool completely before feeding them to your dog, as hot treats can burn their mouths.
- Not Storing Properly: Not using an airtight container can lead to stale treats. Be sure to store them correctly to maintain freshness.
Storing Tips for the Recipe
These Green Bean and Chicken Crunchies for Dogs can be stored for up to two weeks in an airtight container at room temperature. For longer storage:
- Freeze the uncooked treats on a baking sheet until solid, then transfer them to a zip-lock bag. They can last up to three months in the freezer, allowing you to bake fresh treats whenever you wish!
Conclusion
Making Green Bean and Chicken Crunchies for Dogs is not only straightforward but also a rewarding experience. By using simple, wholesome ingredients, you can treat your furry friend while knowing exactly what they’re eating. We encourage you to try this recipe out and let us know how your dog enjoys their homemade goodies!
If your pup loves them, consider sharing this recipe with fellow pet owners or exploring more dog-friendly recipes available on our blog!
FAQs
Can I use different ingredients?
Absolutely! Feel free to customize this recipe based on what you have at home or your dog’s dietary needs.
How many treats does this recipe yield?
This recipe typically yields about 24 treats, depending on the size of your cookie cutter.
Why are homemade treats better for my dog?
Homemade treats allow you complete control over the ingredients, ensuring you avoid any fillers, preservatives, or additives often found in commercial dog treats.
Can I add other flavors?
Definitely! Ingredients like sweet potatoes, spinach, or even peanut butter (make sure it’s xylitol-free) can be great additions to this treat.
How do I know if my dog is allergic to any ingredients?
Always introduce new foods gradually, and monitor your pet for any adverse reactions. If unsure, consult your veterinarian.
Dive into the rewarding world of making homemade treats and strengthen your bond with your canine companion while keeping their health in mind!
Leave a Reply